Well, it’s been a lazy summer for me blog-wise. I’ve always reminded myself, “The blog is not work, not work, not work!” And whenever it felt like work, I just skipped it. Partly because, this summer at least, I’ve had a couple of weeks of travelling — o lucky me! — but also, because I’ve been interacting with people a more old-fashioned way … face-to-face.
My Meetup group, The Portland Sewing Circle, started in June. We’ve been growing steadily, but we just got pushed over the edge from “smallish” to “biggish” (by my standards, anyway) by an article in last week’s Oregonian. Who says print is dead?!? We got a wonderful response, with twenty-odd new members in just a few days. Hurray! And our last Saturday meeting, which was already poised to be a big one, was really lively, with twenty-odd participants tearing and taping and making their own Duct Tape Doubles.


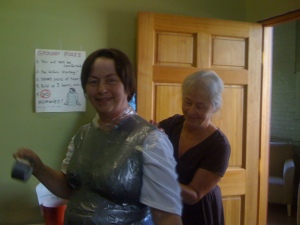
Making one of these babies is a LOT of work, and we teamed up in groups of 3. We were lucky to have quite a few helpers, who weren’t there to get taped but to watch, tape and learn. With their help, we got almost everyone done in time.

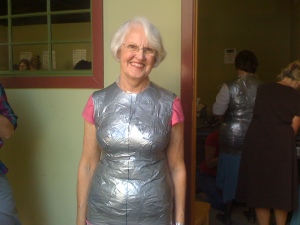
It was fun being surrounded by so many Tin Woods(wo)men! I had handouts and posters, which I hope helped.
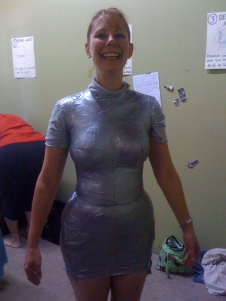
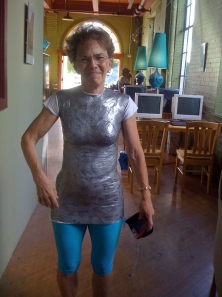

BUT — in my experience, anyway — this first stage in some ways is easier than the next. Yes, friend, now we have to finish
these duct-tape shells into actual working dress forms.
You may be lucky enough to have a definite idea about how to do this. At least 2 Sewing-Circle-ers have old, smaller forms, which they will hand their new ones onto. I think their challenge will be how to stuff the duct tape shell correctly – it’s got to be stuffed firmly to hold its shape – but they’ll have strong, stable bases for their forms. Others might live with experienced handy-man types or be handy enough to figure it all out on their own, following Internet resources or the handout I provided. If you’re stuck, PLEASE COME TO TUESDAY’S MEETING. We can brainstorm specific solutions right there. And if you can’t make it — well, here are some ideas.
Finish 1: Hanging
The easiest thing to do is to give the form a solid base and put a clothes-hanger in the shoulders. This way, the form can be hung up from a hook. It will be easy to put skirts and pants on it, and it’s easily stored in a closet. You can also place the form on a base, like a speaker stand:

$5 – $15 on Craig’s List. You can glue Velcro to the form and the speaker stand for more stability. I like this solution, because it’s fairly easy, and gives you the flexibility to have your form suspended OR on a stand, for fitting pants, skirts AND shirts.
To finish your form this way: start by taping a strong hanger (like a wooden coat hanger) to the shoulders of the form. Reinforce first by duct-taping cardboard pieces or shoulderpads to the hanger and to the form’s shoulders from the inside. You don’t want the shoulders to buckle. Put the hanger in place and tape it solidly to the shoulders from the inside. Then, tape all around the hanger’s hook, building up the neck as much as needed. You might also fill the neck hole with a circle of cardboard, poking the hanger through the middle. Tape it shut, getting a nice circular shape to the neck.
After the neck is done, overlap the back seam and tape it shut. (Compare YOUR measurements and the FORM’s measurements right about now!) Cut the base out of sturdy cardboard or plywood. It’s hard to get this right. Your form will tend to flatten out, and it’s hard to know how deep the base should be. The base should be an oval or lozenge shape– whatever your own cross-section is. You may need very strong scissors, or a utility knife, to get the base flat so the form stands straight up and down.
When the neck is done and the back is taped – stuff, stuff, stuff! (Polyfill, old pillows, plastic bags, or any combination will do. I have no idea about how well expandable foam would work, so I can’t recommend that.) Compare your measurements as you go, if possible, and tighten or loosen at the back seam. Finish off the armholes as you did the neck, with cardboard circles or just duct tape. Stuff from the big hole at the bottom. It will take even more stuffing than you thought possible, but keep going! As it gets fuller, test by pressing all over to see if any part caves in (not too hard, but the form needs to stand up to clothes-fitting). When you have a good balance, put the base in place and tape it in.
Finish the entire form off with a non-stretchy final coat, like clear packing tape, a fitting shell, or with strips of cloth glued in place. You’re done!
Finish 2: Standing
The other way to finish is with a stand. This is a very polished look, but has the drawback that it may be hard to fit pants with such a form. For me, personally, it’s tricky to stuff, as well.
First – find a stand. Microphone stands work well; they cost $15-$20 on Craig’s List; an old floor lamp (as seen on the handout) would work, too. Then, find a piece for a cross-brace. Any scrap of wood should do, as long as it fits across the shoulders neatly from the inside – in other words, if the cross-brace is *just* narrower than you are at the shoulders. Duct-tape the crossbrace sturdily to the stand. Don’t skimp on this step! Make the cross-brace as strong as possible. (Otherwise, in my experience, the form swings around crazily and works its way dowwwwnnn the stand towards the ground eventually.)
Before putting the form on the stand, trace the base and cut it out of heavy cardboard or plywood. It’s hard to get the right shape, but don’t skimp; it’s important! Some people cut a hole in the base and thread it over the stand before the next step. I am less organized, and just cut a notch out and set it aside.
Reinforce the shoulders from the inside with cardboard and more duct tape. Place the form over the cross-brace , onto the stand, putting stuffing in the shoulders and neck as needed, and finishing the neck and armholes as above (with a cardboard circle and duct tape or just more duct tape). Don’t be in a hurry to finish the neck-hole and armholes, though. You might find that you need to add stuffing though these holes before you’re done, so wait as long as possible. Tape the back seam as above – overlap as much as needed to match your measurements and the form’s. To stuff, you’ll be working against gravity. Fill the shoulders and arms as well as possible, then stuff madly to get it filled. As above, it takes a LOT of filling, and be sure to press all around for equal firmness before you tape up the bottom.
When stuffing is done, put the base in place. Either slide it up the pole (if you’ve cut a hole) or fit it into place (if you’ve cut a notch). Duct-tape it firmly in place.
Finish the entire form off with a non-stretchy final coat, like clear packing tape, a fitting shell, or with strips of cloth glued in place. You’re done!
Hope that helps. Come back soon if you need more help! Remember we’re meeting Tuesday, Saturday the 12th, and Thursday the 17th or 24th – and more to come.

